

VR is invading every industry, but the arts in particular present an excellent opportunity for communicating personal vision. Whether you want to put someone inside a painting, send them into space, or envelop them in a music video, the sensation of ‘presence’ afforded by VR means that your audience is certain to walk away with an unforgettable experience.
But where to start? Isn’t virtual reality still a crazy-new, uber-intimidating miasma of different products and workflows? And isn’t it expensive?
No, and super no. With this guide I’ll take you through the simplest way to get started with VR without spending (nearly) any money. We’ll make a simple VR app using a program called Unity, and we’ll get it running on any Android smartphone.
Step 1: What You’ll Need
Sketchup Make (FREE!) — this is the 3D program that will have a piece of ‘art’
Unity Personal Edition (FREE!) — this is the video game engine that you’ll use to put ‘art’ on your phone
Android SDK (FREE!) — this will allow Unity to build android apps
Google Cardboard SDK (FREE!) — this is a plugin for Unity that will help make your ‘art’ look all VR-y.
VR Phone Attachment ($10 — $30) — this is the device needed to view your app in virtual reality. You’ll need to attach a headset to your android phone that helps your eyes view your screen properly. My personal favorite is the C-1 Glass by GoggleTech.
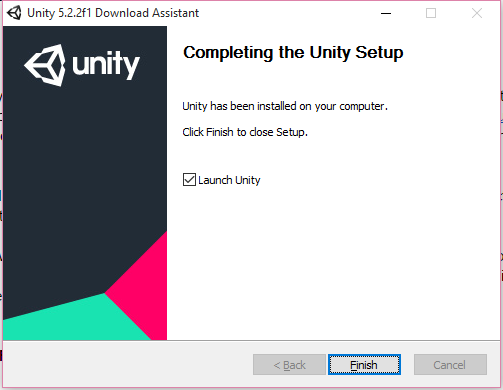
Step 2: Install Free Stuff
Install Sketchup, Unity, and Android Studio, but since the Google Cardboard download is a Unity plugin, don’t open it yet. When installing the Android SDK, remember where you put it — later on you’ll need to tell Unity where it is.
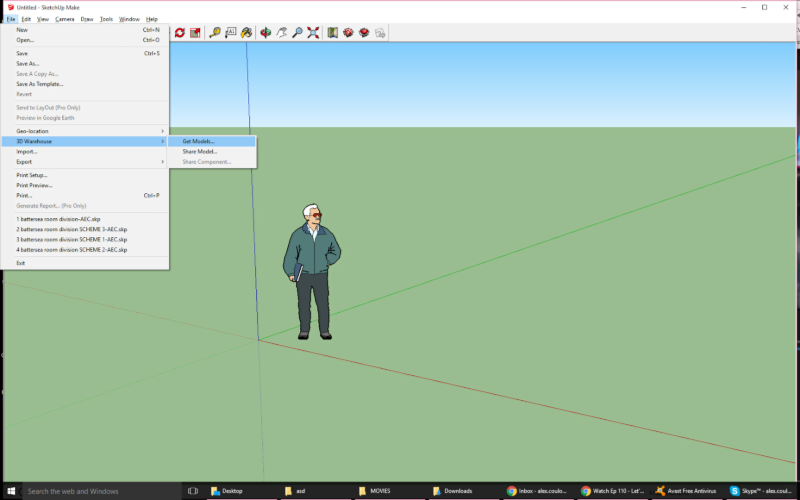
Step 3: Let’s find some art!
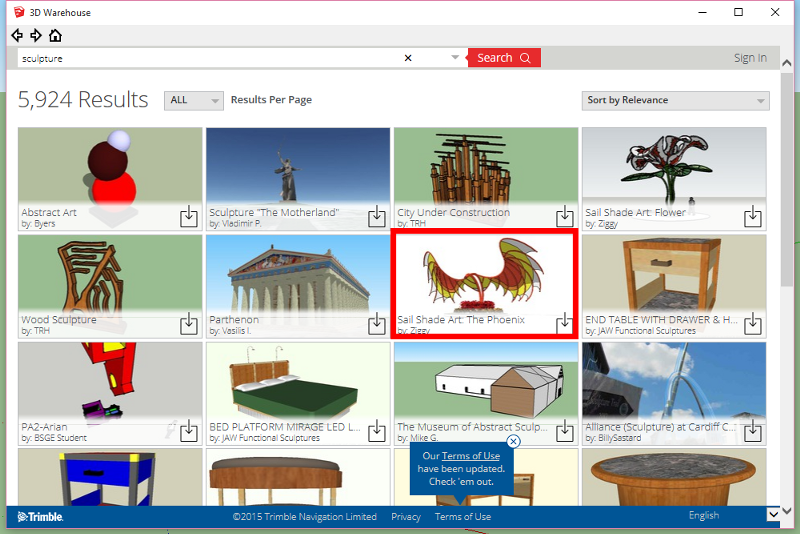
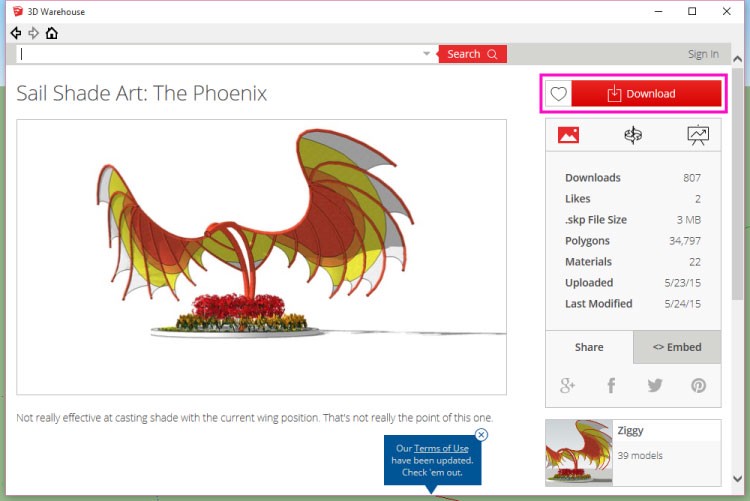
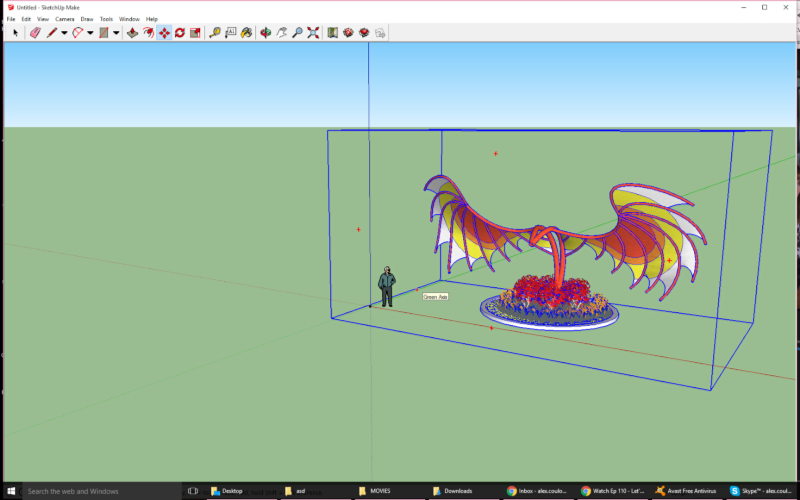
Open Sketchup. It will ask you to choose a template — pick whatever you want. Now let’s go to the Google Warehouse by choosing ‘File’, then ‘3D Warehouse’, then ‘Get Models.’ Pick something that will be fun to view in VR. I searched for ‘sculpture’ and came up with this thing called ‘Sail Shade Art: The Phoenix’ by Ziggy. Click download, then answer yes when it asks if you want to load it directly into your model. Go to ‘File’ then ‘Save’ and remember where you saved your file.
Step 4: Prepare your art for VR in Unity
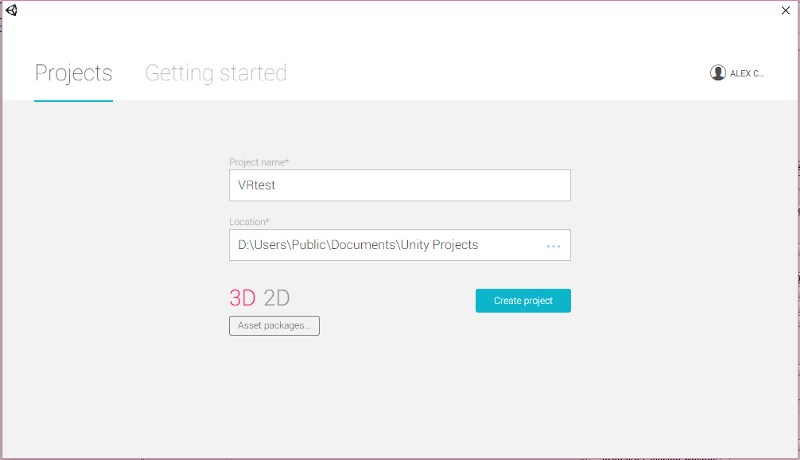
Open Unity. Create a new project.
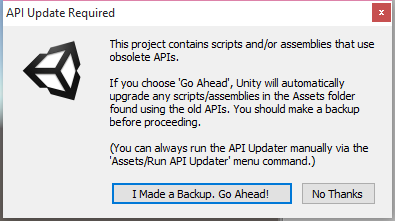
Now double click on the Google Cardboard SDK download, which should be called ‘CardboardSDKForUnity.unitypackage’.
If you get a screen like this, don’t worry about it — just click ‘go ahead.’
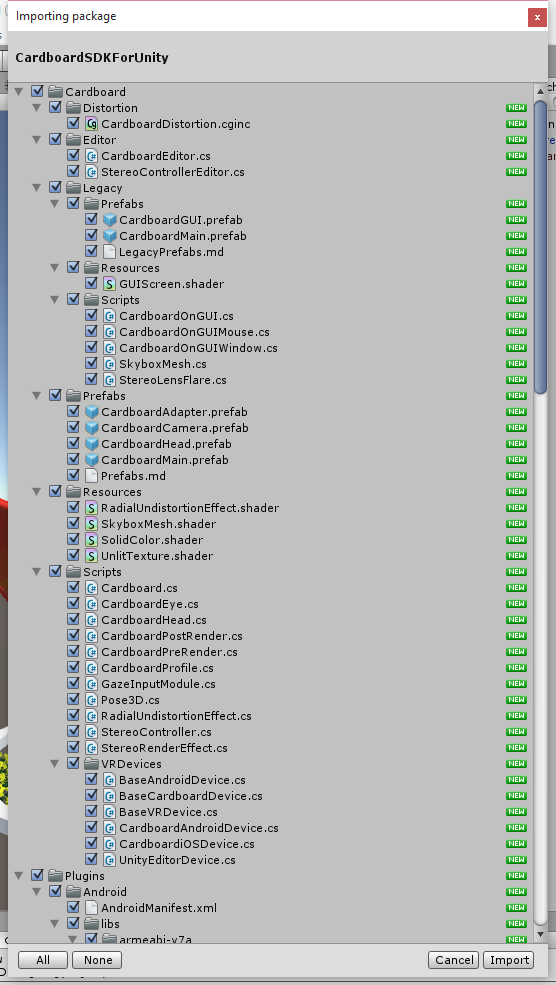
When it loads into Unity, make sure everything is checked and click ‘Import’.
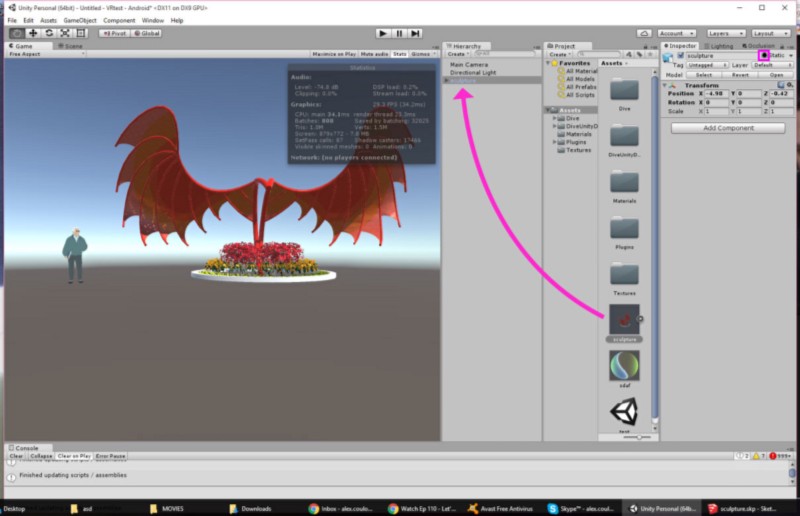
Now let’s load in our Sketchup model. Unity is great with drag-and-drop, so find the saved file, and drag it into the Unity ‘Assets’ folder in the file explorer. Unity will now import the model and generate materials for it.
Drag the sketchup file now in your assets folder over into the ‘Hierarchy tab’. It should appear in your scene. If you don’t see it, it may be out of view or a strange size. Over in the ‘Inspector’ tab, try messing around with the x,y,z position or scale until it’s in a good spot. Finally, click the little checkbox that says ‘static,’ which tells Unity this object will not be moving.
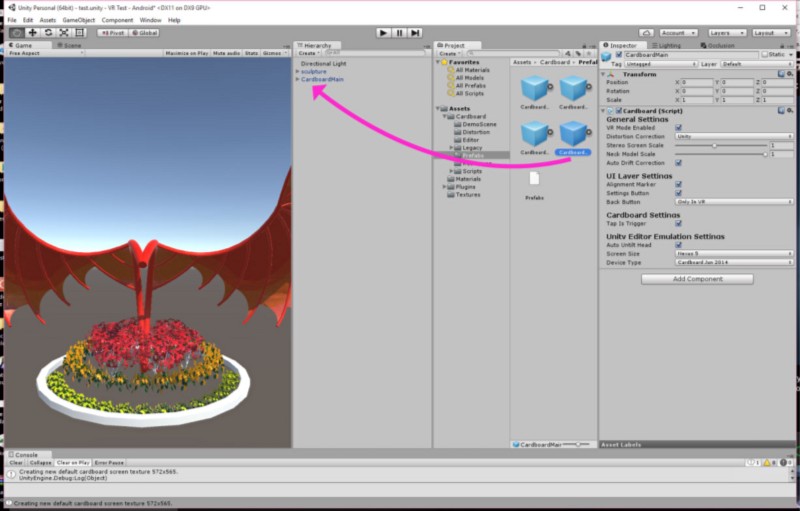
Next, navigate to Assets/Cardboard/Prefabs in your Unity file explorer window. In there you’ll find a file called ‘Cardboard Main’. Just like with the sketchup file, drag that file into the Unity tab labeled ‘Hierarchy.’ In that same tab, delete the object called ‘Main Camera.’ We’re replacing that normal camera with a VR one, so we don’t need it.
Now is a great time to save your scene — go to ‘File,’ then ‘Save Scene.’ The scene should be saved somewhere in your Assets folder. Common practice is to create a new folder called ‘_Scenes’ (so it’s always the first folder), and save it in there. Feel free to conform, or be a rebel.
Step 5: Define the App settings
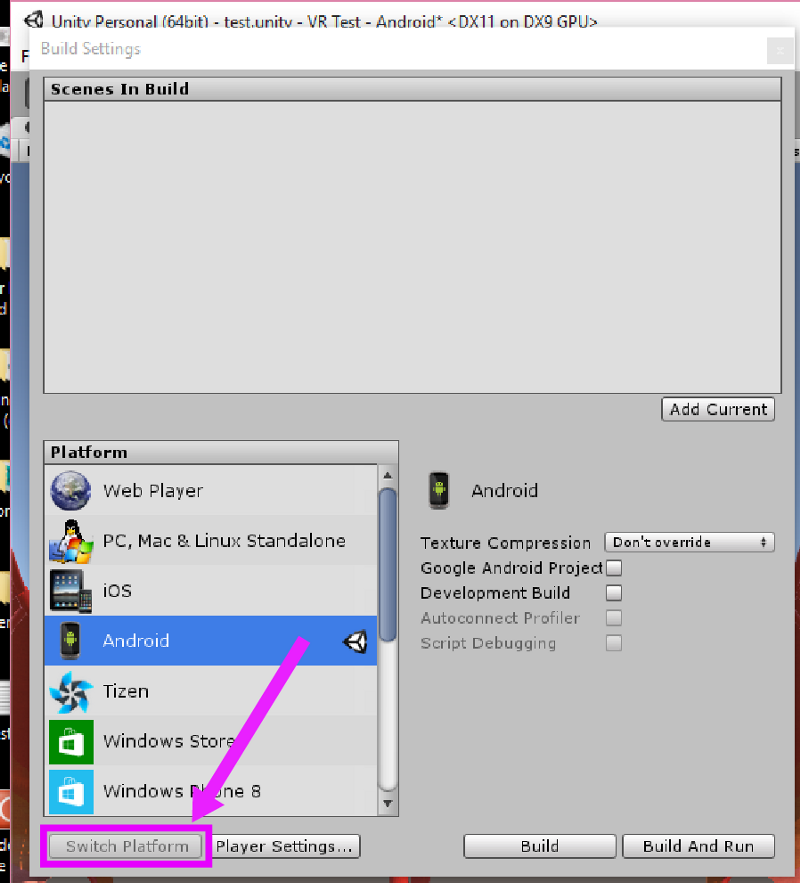
Go to ‘File’, then ‘Build Settings’, and choose ‘Android.’ In the bottom left, click ‘Switch Platform’. It may take a moment to rebuild the scene.
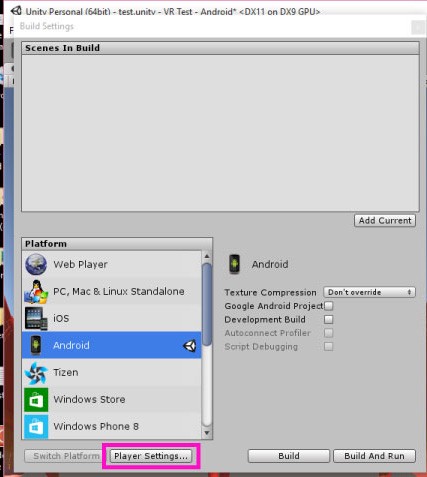
When you can, next to that button click ‘Player Settings.’
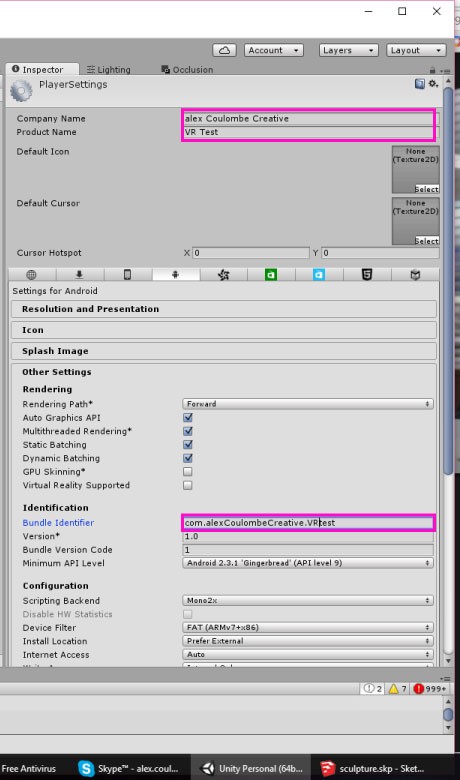
You should now be looking at Android settings off to the right. Fill in some information for ‘Company Name’, ‘Product Name’, and ‘Bundle Identifier’, all the while keeping to the format of com.xxxx.xxxx
Finally, check ‘Multithreaded Rendering’, ‘Static Batching’ and ‘Dynamic Batching’, then scroll to the bottom and check the box ‘Optimize Mesh Data.’ In case you have a complicated object in the scene, this will help it run smoother on your phone.
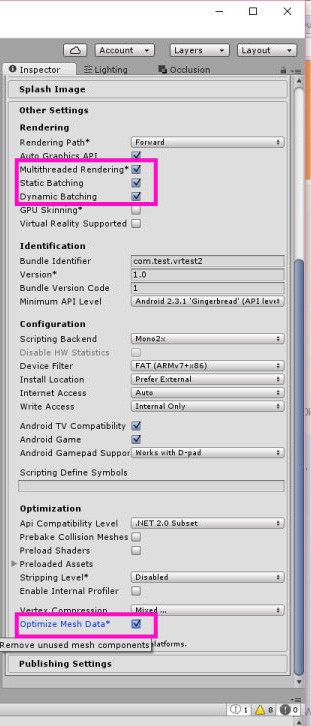
DO NOT check ‘Virtual Reality supported.’ That checkbox is for the Oculus Rift and Samsung Gear VR, which we are not working with here. Checking that box will cause your app to show nothing but a black screen.
Step 6: Build the App and Put it On Your Phone
Go back to ‘File’ then ‘Build Settings,’ and now choose ‘Build.’ It’s time to build an apk file, which is what Android phones read to install apps. Save it somewhere easy to access, as we’re about to send it over to your phone.
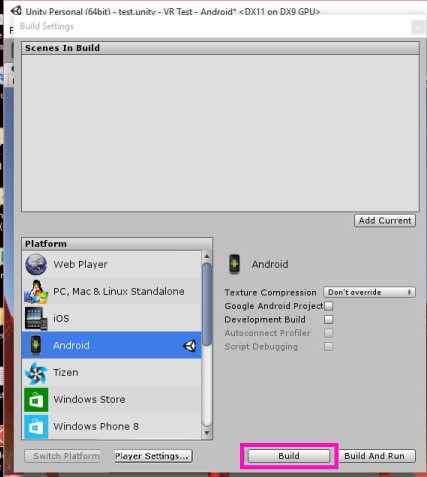
At some point, Unity will ask you for the location of the Android SDK. Point Unity to whatever folder you extracted it to at the beginning.
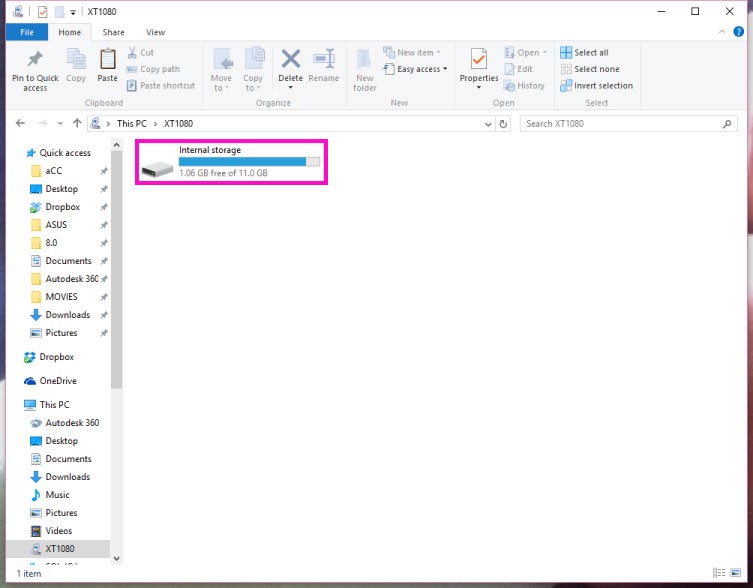
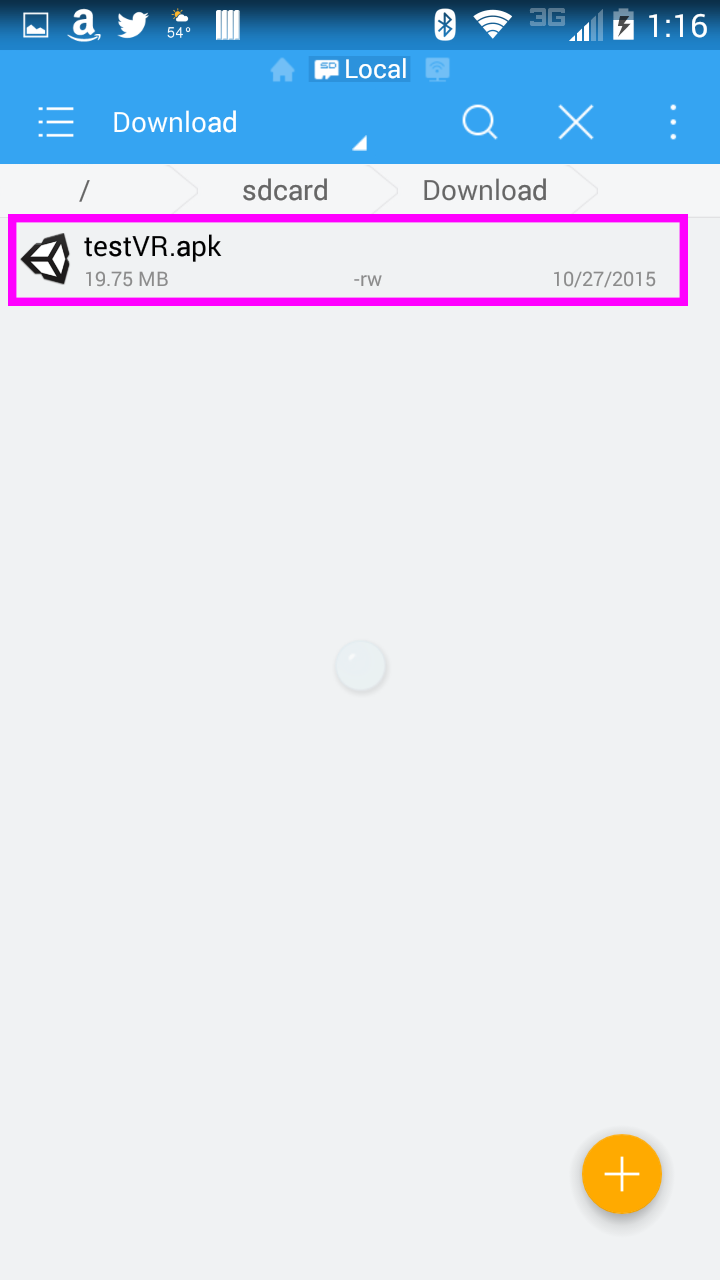
Plug your phone into your computer, open a directory (‘Download,’ for example) and copy the apk file onto your phone.

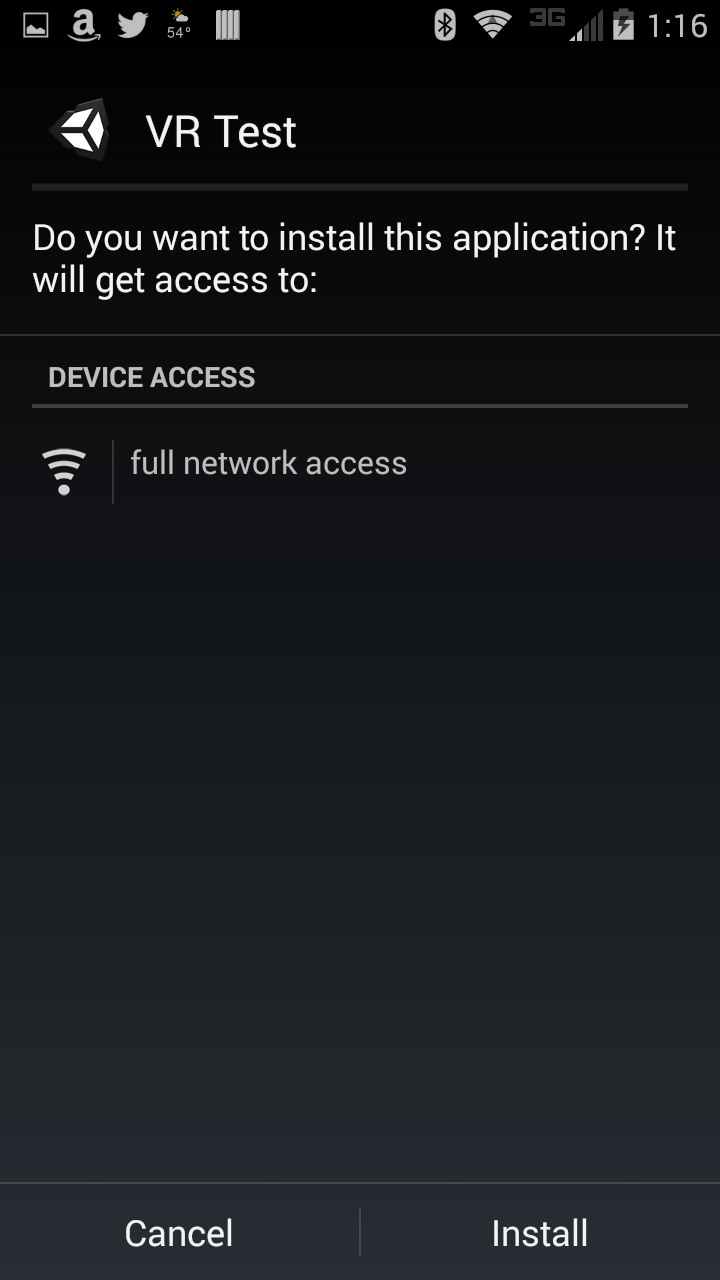
Next, find the apk file on your phone (I use an app called ES File Explorer), then tap it and choose to install. Be sure in your phone settings you have allowed installation of unknown applications (more info here).
Step 7: Test the App
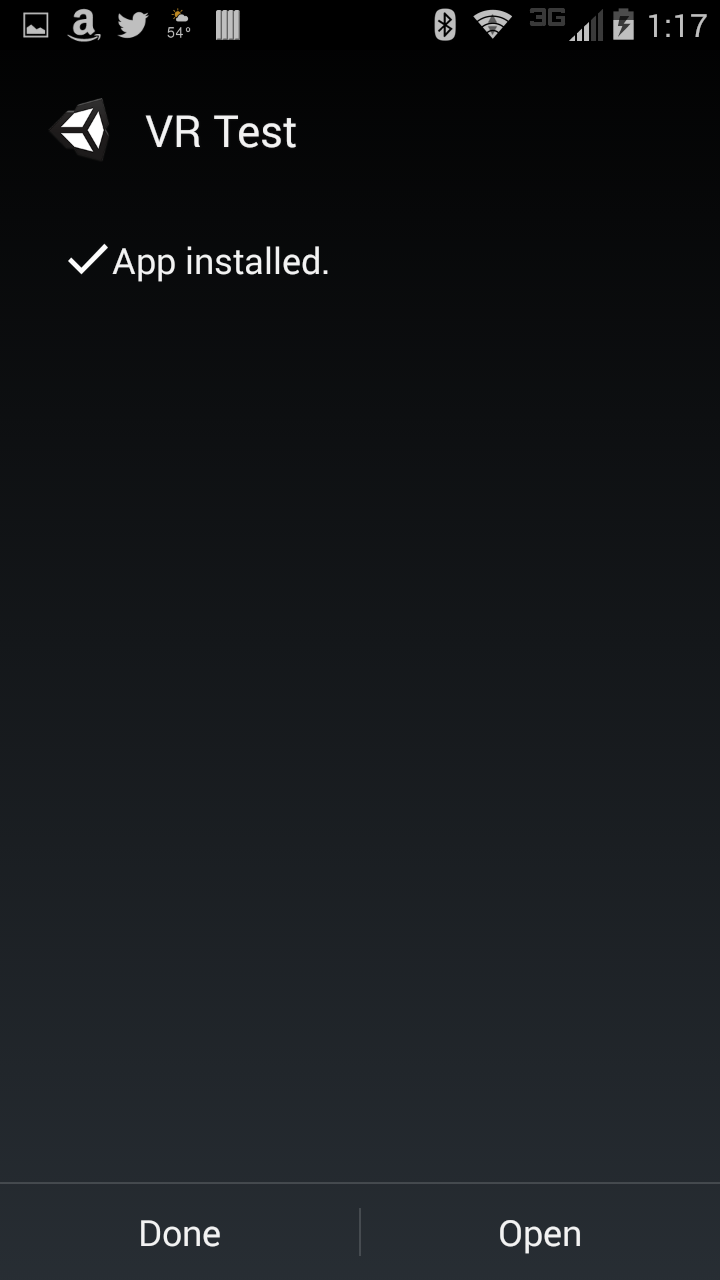
Now click ‘Open’ or tap the new app in your App Menu.
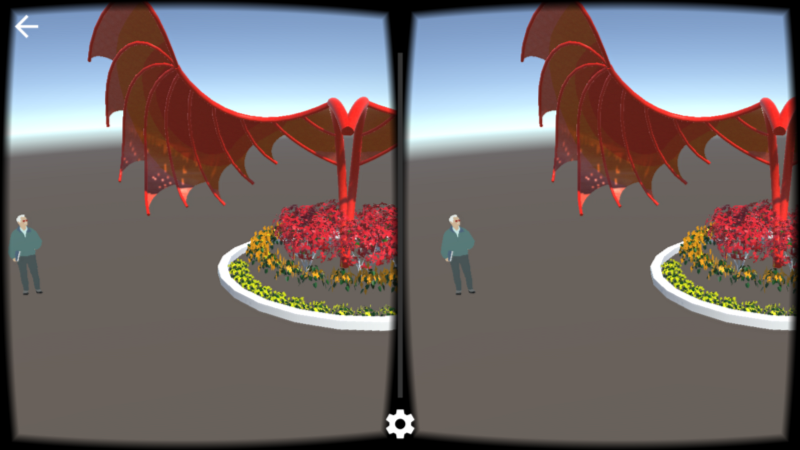
The first screen should look like this:

Put on your VR headset, rotate your phone to a landscape orientation, then look around and be amazed.
— — — — — — — — — — — — — — — — — — — — — — — — — — — — — —
Congratulations! You just made your first VR app. As you might imagine, we’ve just barely scratched the surface of what can be done. Feel free to go back and play around then re-export your app. What happens if you drop a light or two in your Unity scene? What if you try modifying or adding models in Sketchup? What if you drop an mp3 file in there? The possibilities are endless.
Now go forth, and and enjoy yourself.
If you like this post, let us know! If enough people ask for it, I’ll do a similar guide for building to iPhone. Heck, I might even teach some simple scripting so you can make things happen in the VR app like turning stuff on and off or changing materials. Or maybe we’ll just blow stuff up.
— Alex Coulombe makes lots of stuff in VR as well as in not-VR. His website is very 2009, so instead of going to alexcoulombe.com, you should probably just follow his updates at news.alexcoulombe.com
.svg)